When water damage hits, you need to act fast, but you also need to act correctly. You’ll shut off power, remove valuables, and start extraction before moisture spreads into walls, floors, and wiring. From there, drying, repair, and careful inspection determine whether you can restore materials or need to replace them. The right steps now can prevent mold, structural loss, and costly mistakes later.
Key Takeaways
- Shut off power and the water source immediately, then protect yourself and document the damage with photos.
- Remove standing water fast using pumps or extractors, including hidden moisture in carpets, seams, and low spots.
- Dry the structure thoroughly with moisture meters, humidity checks, and airflow to prevent warping and mold.
- Inspect and replace damaged drywall, insulation, flooring, and framing that are swollen, soft, or structurally compromised.
- Choose a licensed, insured repair company with 24/7 response, proper equipment, and clear moisture documentation.
What to Do First After Water Damage
The first few minutes after water damage matter most, so you should act quickly and safely.
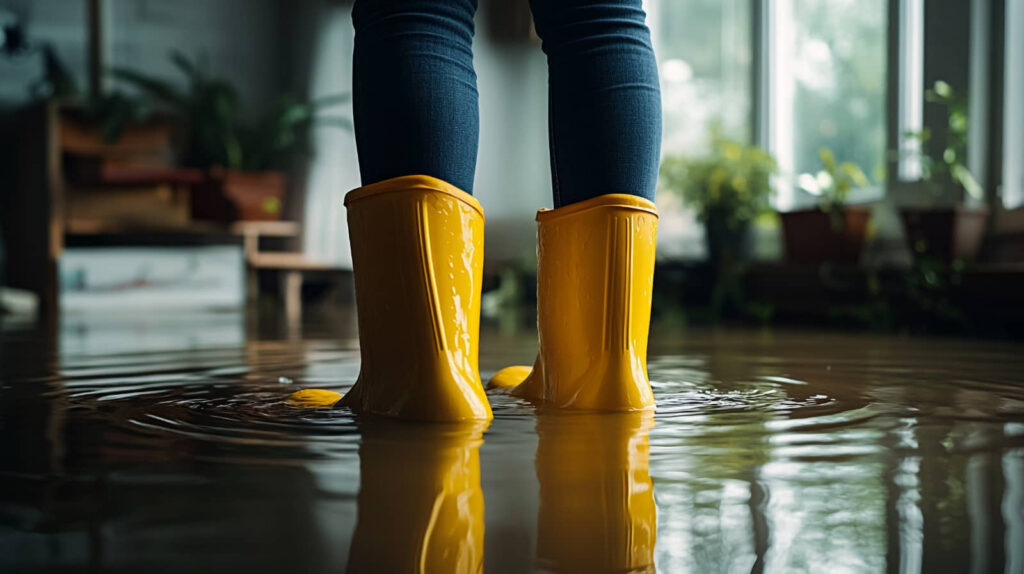
First, cut power to affected areas if you can reach the breaker without standing in water. Next, stop the source if it’s visible and easy to shut off, then protect yourself with gloves and boots.
Move valuables, documents, and electronics to a dry room. Open windows and doors only if weather allows, because better airflow can slow further deterioration.
Take clear photos of affected spaces for your records before you disturb anything. Then contact a trusted water damage repair professional so your team can assess the damage, limit hidden moisture, and plan the next steps.
Acting early helps you stay in control and keeps your home’s recovery on track.
Emergency Water Removal and Extraction
Once the site is safe, emergency water removal begins immediately to limit absorption, warping, and microbial growth.
You’ll want trained technicians to use submersible pumps for standing water, then high-capacity extractors on carpets, padding, and hard surfaces. They’ll target hidden moisture at edges, seams, and low spots, where water settles fastest.
This step reduces how long materials stay saturated, which helps preserve finishes and makes the rest of the repair process more manageable.
You’re not handling this alone; the crew will map affected areas, remove bulk water efficiently, and keep you informed at each stage.
Quick extraction also helps stabilize indoor conditions and prepares your property for the next phase of restoration with confidence and control.
How Structural Drying Prevents Bigger Problems
You use moisture meters, thermal imaging, and humidity checks to find hidden water in drywall, framing, and subfloors before it can spread.
Once you dry the structure completely, you reduce the conditions that mold needs to grow and protect the building from warping, rot, and hidden deterioration.
This step keeps the repair controlled, so you’re fixing the actual damage instead of chasing new problems later.
Moisture Detection Methods
Moisture detection starts with a careful inspection using tools like moisture meters, thermal imaging cameras, and hygrometers to find hidden water in floors, walls, and ceilings. You’ll get a clear map of where drying should focus, so you’re not guessing.
- Moisture meters verify saturated materials
- Thermal cameras reveal cooler damp zones
- Hygrometers track indoor humidity levels
- Visual checks confirm swelling, staining, and soft spots
You can compare readings across rooms and identify trapped moisture behind finishes, under flooring, and inside framing.
This data helps you place air movers and dehumidifiers where they’ll work best. When you measure accurately, you shorten drying time, protect building materials, and stay in control.
You’re part of a process designed to restore your space with confidence.
Preventing Mold Growth
Even a small amount of lingering water can create the conditions mold needs to spread, so structural drying has to begin quickly and continue until materials are fully stabilized.
You protect your property by lowering moisture content in framing, drywall, subfloors, and insulation before spores can colonize damp surfaces.
Technicians use air movers, dehumidifiers, and targeted heat to drive evaporation, while monitoring humidity and material readings to confirm progress.
You’ll also limit cross-contamination by removing unsalvageable materials and cleaning affected areas promptly.
When drying stays controlled, you reduce odor, staining, and hidden decay, and you help your home return to a safe, healthy state.
With the right response, you and your household can move forward with confidence, knowing the structure’s moisture risk has been addressed.
How Water Damage Repair Handles Electrical Risks
You’ll need to shut off power to affected circuits or the main supply before any cleanup starts, because standing water can energize outlets, appliances, and hidden conductors.
Wet wiring can’t be trusted even after the surface dries, since insulation, junctions, and breakers may still be compromised.
A qualified technician should inspect the electrical system, test for faults, and clear it for safe re-energizing only after repairs are complete.
Power Shutdown Procedures
When water reaches outlets, wiring, or appliances, shut off power to the affected area before any cleanup begins, because electricity and standing water create a serious shock and fire risk. You’ll protect yourself and everyone in the home by isolating the circuit at the breaker panel, then confirming the area stays de-energized.
If you can’t safely reach the panel, call a licensed electrician or your utility provider.
- Identify the wet rooms first.
- Turn off branch breakers, not just wall switches.
- Keep hands dry and stand on a dry surface.
- Label unsafe zones so your team stays aligned.
After shutdown, you can begin water removal and drying with confidence, knowing your crew’s safety comes first.
When you follow this process, you’re not alone—you’re building a safer, more controlled recovery together.
Wet Wiring Hazards
Wet wiring is one of the most serious hazards in water damage repair, because moisture can bridge live conductors, corrode connections, and turn hidden faults into shock or fire risks. You should treat every damp outlet, junction box, and cable run as energized until a qualified technician proves otherwise.
After you’ve shut down power, keep wet materials isolated, use insulated tools, and avoid restoring circuits that still show moisture or contamination. Your repair team may dry wiring pathways with controlled airflow and dehumidification, then replace damaged devices, splices, and insulation that can’t safely recover.
That careful process helps you stay safe while your property starts to recover. You’re not dealing with this alone; trained pros handle the electrical danger so the rest of the restoration can move forward confidently and safely.
Electrical System Inspection
Because water can damage hidden wiring as well as visible fixtures, a proper electrical system inspection is one of the first safety checks in any water damage repair project. You’ll feel more confident when a licensed technician de-energizes affected circuits, tests outlets, and traces moisture into panels, junction boxes, and appliances.
That careful process helps your team protect everyone on site.
- Shut off power to wet zones
- Check breakers, outlets, and GFCIs
- Measure moisture in walls and floors
- Replace compromised wiring or fixtures
If your system passes inspection, repair can continue safely. If it doesn’t, your electrician isolates the hazard, documents the damage, and coordinates with drying crews so restoration stays efficient.
You’re not handling this alone; your crew works together to restore safety, code compliance, and peace of mind.
Water Damage Repair for Floors, Walls, and Ceilings
After the water is removed and the structure is dried, you can start repairing floors, walls, and ceilings with a clear plan that limits further damage.
You’ll inspect each surface for swelling, delamination, warping, and soft spots, then remove only the compromised materials.
For floors, replace damaged underlayment, reset loose boards, and level subfloors before installing new finish materials.
For walls, cut out weakened drywall, check framing for distortion, and fit new panels with tight seams.
For ceilings, secure any sagging sections, replace stained board, and fasten fresh material to sound joists.
Use matching textures and finishes so your rooms look cohesive again.
When you work methodically, you protect the structure and help your home feel whole, familiar, and safe again.
How Water Damage Repair Prevents Mold
Moisture control is the key to preventing mold during water damage repair, so you need to remove standing water quickly, dry materials completely, and stop dampness from lingering in hidden spaces.
You protect your home by lowering humidity, increasing airflow, and monitoring moisture with reliable tools. When you act fast, you help your structure return to a safe, stable condition and keep your household on track.
- Extract water with powerful equipment
- Dry framing, drywall, and subfloors
- Check corners, cavities, and joints
- Confirm moisture readings stay low
This process limits spores from finding the wet surfaces they need to grow.
You’re not dealing with this alone; careful drying and inspection give you a clear path forward. With each step, you reduce risk and support a cleaner, healthier space for everyone who lives there.
When to Replace Materials Instead of Repairing
Sometimes repair isn’t the safest or most cost-effective option, and you’ll need to replace materials that can’t dry out fully or have lost their structural integrity.
You should replace saturated drywall, insulation, particleboard, and warped subflooring when water has soaked them for long periods. These materials trap moisture, weaken quickly, and can’t reliably regain strength after drying.
You’ll also want to remove finishes that’ve separated, swollen, or started to delaminate, because they won’t bond properly during repair.
If framing shows persistent softness, rot, or widespread staining, replacement gives you a safer, longer-lasting result.
How to Document Water Damage for Insurance
Before cleanup starts, document the damage thoroughly so you can support your insurance claim and preserve evidence of the loss.
Walk through every affected room and take wide shots, then close-ups of stained drywall, warped flooring, soaked insulation, and damaged belongings. Use your phone’s timestamp and keep files in one folder.
- Photograph standing water and moisture lines
- Record the date, time, and source if known
- Save receipts for emergency supplies and repairs
- Note odors, discoloration, and affected utilities
Create a simple inventory with item names, brand details, and estimated values.
Don’t discard anything until your insurer approves removal. Share copies of photos and notes with everyone involved, so you’ll feel organized and supported during the claims process.
How to Choose a Water Damage Repair Company
When you choose a water damage repair company, verify that it holds proper licensing and carries liability and workers’ compensation insurance, so you’re protected if the worksite causes further damage or injury.
You should also confirm that the crew uses professional moisture meters, air movers, and dehumidifiers, because proper equipment drives effective water extraction and structural drying.
Fast response time matters, since prompt mitigation reduces mold growth, limits material loss, and improves the chances of full restoration.
Licensing And Insurance
Licensing and insurance should be two of your first checks when choosing a water damage repair company, because they help confirm the contractor can handle emergency water removal, structural drying, and full restoration work responsibly.
You want a team that meets local licensing rules and carries strong coverage, so you’re protected if something goes wrong. Ask for proof, then verify it directly.
- Active contractor license
- General liability insurance
- Workers’ compensation coverage
- Written policy details
These documents show the company takes compliance seriously and values your property.
When you work with a properly insured, licensed team, you join a network of homeowners who expect safe, professional results. That confidence matters when moisture has already stressed your home and you need reliable help.
Response Time And Equipment
Fast response and professional equipment often determine how much damage your home ultimately suffers, so you should ask how quickly a company can arrive and what gear it brings for water extraction, drying, and monitoring.
You want a team that can mobilize within hours, because standing water feeds mold, warps framing, and weakens materials fast. Look for truck-mounted extractors, industrial air movers, dehumidifiers, moisture meters, and thermal imaging tools.
These let technicians remove water, dry hidden cavities, and verify progress with measurements, not guesswork. Ask whether they provide 24/7 dispatch, document readings, and adjust the drying plan as conditions change.
When you choose a company with the right equipment and rapid response, you’re joining forces with people who can protect your home and help you feel confident again.
How to Prevent Future Water Damage
To reduce the risk of future water damage, you should combine routine inspection with prompt maintenance and a few targeted upgrades. Check supply lines, appliance hoses, roofs, and flashing every season so you can catch leaks early.
Seal gaps around windows, doors, and utility penetrations to keep moisture out. Install smart leak sensors near sinks, water heaters, and laundry areas; they’ll alert you before small issues spread.
- Clean gutters and downspouts
- Test sump pumps and backups
- Insulate exposed pipes
- Maintain proper grading
If you live in a moisture-prone home, join neighbors who protect their properties with the same disciplined habits.
That shared vigilance helps you avoid costly repairs and keep your structure dry, stable, and ready for years ahead.
Frequently Asked Questions
How Long Does Water Damage Repair Usually Take?
You’re usually looking at 3–7 days for drying and minor repairs, but full restoration can take 1–3 weeks. Your timeline depends on damage severity, materials affected, and how quickly you start extraction and structural drying.
Can Water-Damaged Belongings Be Saved?
Yes, you can often save water-damaged belongings if you act quickly. You’ll need to dry, clean, and disinfect items promptly, then assess materials carefully; porous items may need replacement, while furniture and electronics might recover.
Does Homeowners Insurance Cover All Water Damage Repairs?
No, you usually won’t get full coverage. You’ll likely see insurance cover sudden, accidental damage, but not flooding, neglect, or wear. Check your policy, document losses, and call your adjuster quickly.
What Signs Indicate Hidden Water Damage Behind Walls?
Musty odors, peeling paint, bubbling drywall, and unexplained stains signal hidden wall damage. You might also notice warped trim, soft spots, or higher humidity. Act quickly; you’re not alone, and early detection limits costly structural repairs.
Are DIY Water Damage Repairs Ever Safe?
Yes, you can safely handle minor, clean-water damage if you act fast, dry materials thoroughly, and wear protection. You shouldn’t tackle soaked drywall, contaminated water, or electrical hazards alone; call a pro.
Conclusion
You’ve seen how fast water damage can spiral, but you also know what to do next. Act quickly, shut off hazards, remove standing water, dry structural materials, and replace anything too damaged to save. Document every step for your insurer and choose a qualified repair team to restore safety and stability. If you stay proactive, you’ll stop small leaks from becoming bigger disasters. With the right response, you can turn the tide and protect your property.